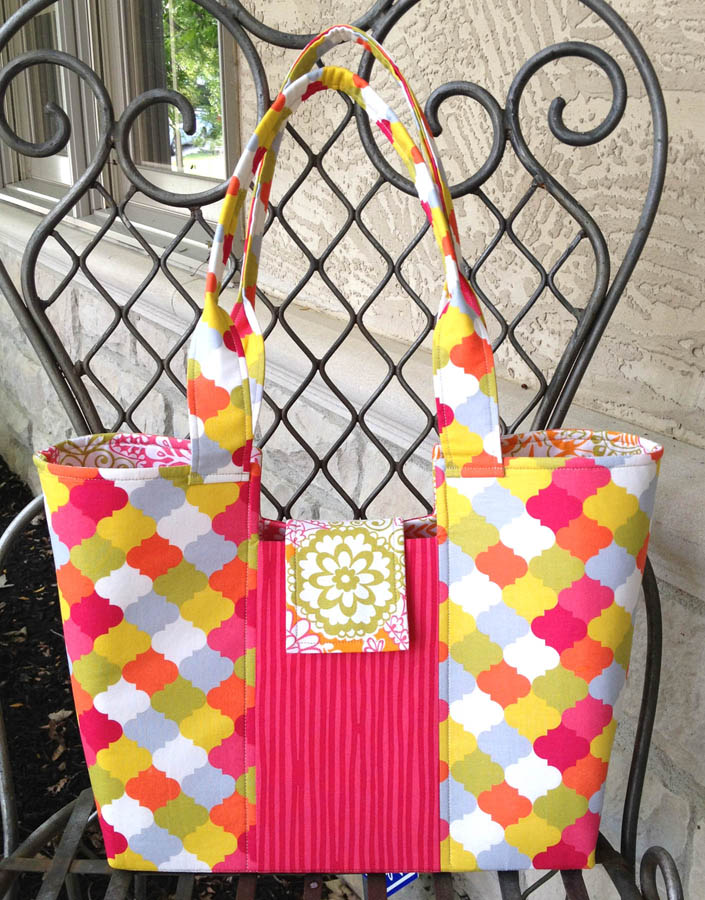
One-Handed Operation
What I'm saying about this dip and the handles is that rather than use your left hand to pull a bag onto your right shoulder with your arm straight like you would pull a sleeve onto your arm, you can raise your right hand (like doing a curl with dumbbell) and there's enough clearance for your bent arm to swing through the handle area. I love this. One-hand operation is really, really convenient.
Handles
Notice the top of the handles. They are folded and topstitched for a thin profile. That narrowing at the top of the handles means they take less space on my shoulder, and that means they stay on my shoulder! Love, love, love that.
Use Inside Pockets From The Outside...Sorta
I also love the inside pockets, of course. The flap closure creates two openings at the top of the bag. This is perfect for reaching into your bag without opening it. That allows these inside pockets that operate as outside pockets. Imagine your cell phone in one end and your wallet in the other. Awesome! But even more awesome than that - I can stow my water bottle in one of these openings for easy-peasy access. Is my love showing yet? Because the bag is open at the top, but partitioned off by the flap, it creates a little cubby hole for a water bottle of almost any height.
Pocket Panel
The inside of the bag hosts a pocket panel that wraps from one side, across the bottom and back up the other side. Now, this is really cool - where it wraps across the bottom it creates a pocket for a Lazy Girl Designs Bag-E-Bottom purse support - sweet! How tidy is that?
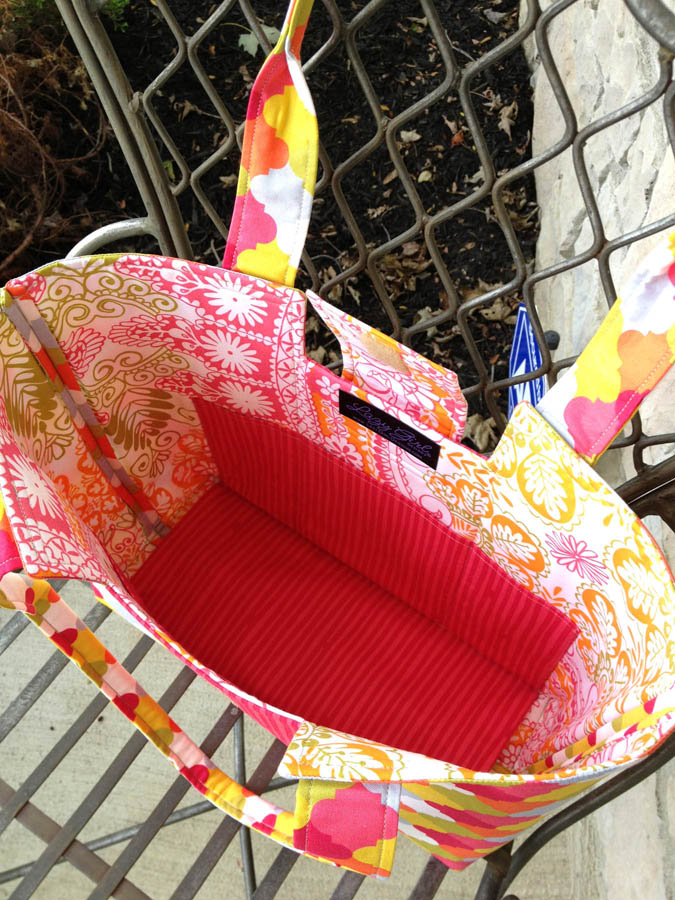
Look at that stand-up-i-tude!
Outside of Bag and BattingHere's the body of the bag. It's three simple panels sewn together. Lay that right sides together with the lining/pockets, place atop batting/fleece and sew all around. Leave an opening to turn and viola - you are nearly done.
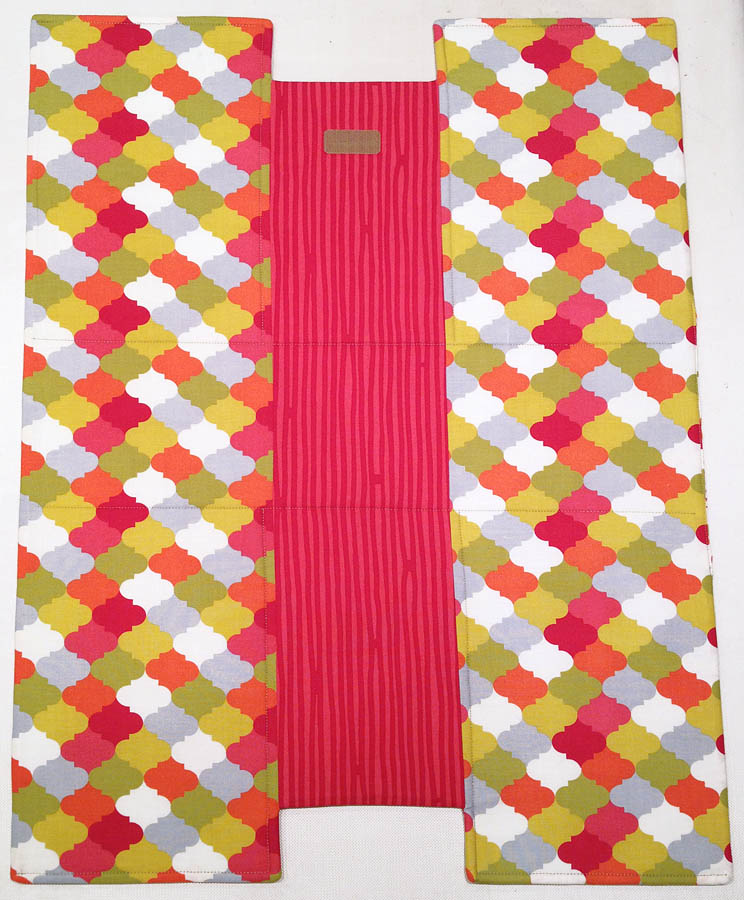
Look how simple this is. It's like a big 'H'. You can do this!
Here's the lining and pocket panel. You can't see the pocket stitchings, but the panel is divided into three pockets for each half of the bag. These same pocket stitchings go through all layers of the bag and result in topstitching on the outside of the bag, defining the three panels we started with - love it! The lining is one piece of fabric.
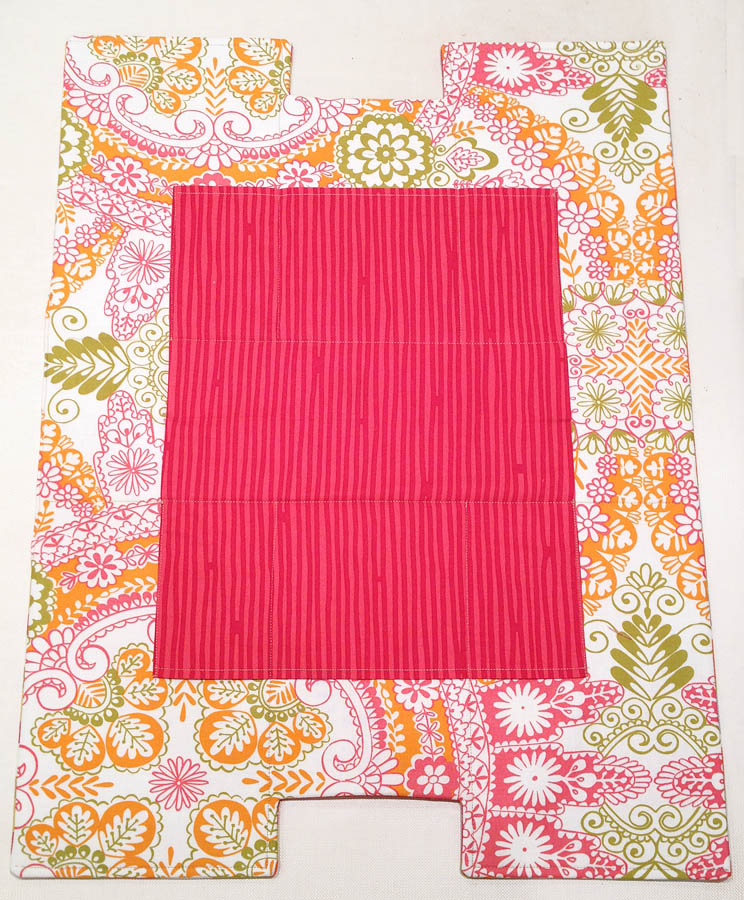
Flap Closure and Handles
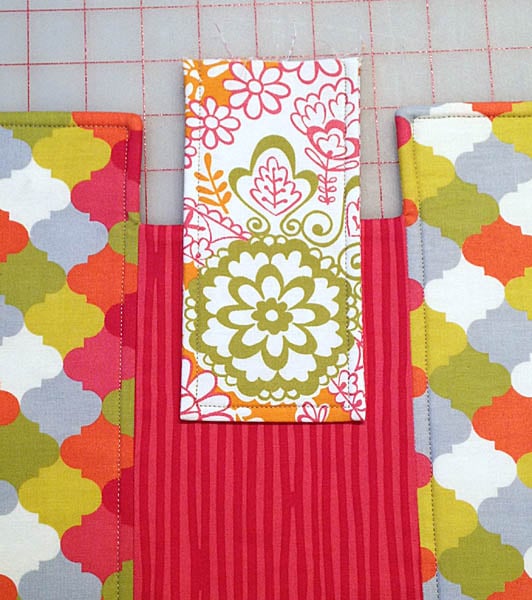
Next add a simple flap closure. Choose a contrasting fabric to make the most of this design element. Here I've used some of the lining fabric to tie everything together. Add simple handles. I used a little soft fusible interfacing for nearly invisible support for the handles.
Finish Gracie
Stitch the side seams and box the bottom and you are good to go! I used Clover Wonder Clips (shown in red below) to help hold the layers together and flat during stitching the side seams and boxing the bottom corners. They worked great! Love those little clips!
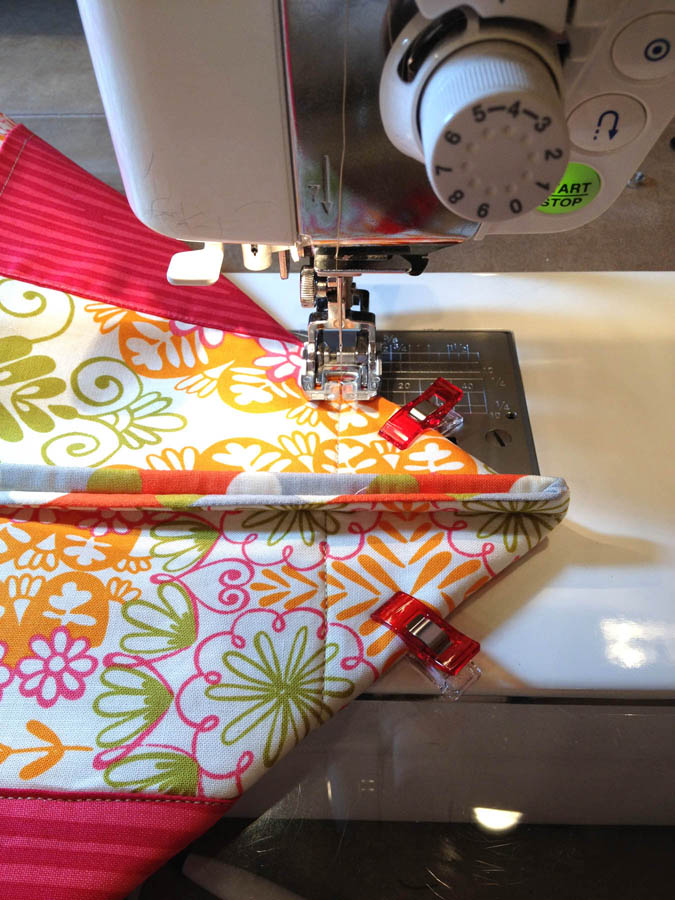
After sewing across the points and turning the bag right sides out, these points tuck into the bottom pocket panel, too! They are totally hidden for a fantastic clean finish to the lining of Gracie. Nice!
Here's a video demo of me making Gracie and talking you through her construction.
Function, Beauty, and Tips
I love the engineering involved in making Gracie and in making her so totally functional. When all the elements of a pattern come together like this I say the pattern 'sings', and until it does that, it doesn't get published. As with the rest of my designs, there are design/engineering/functional elements throughout what may otherwise seem like a simple design. Best of all, each pattern offers some tip or technique you can add to your sewing tool kit and bring to other projects.
Enjoy!
Joan Hawley
Lazy Girl Designs
Lazy Girl on Facebook

I am sold!
ReplyDeleteJoan -- thanks for some early morning enticement! Love the Gracie handbag and your demo is so easy to understand!
ReplyDeleteMuch appreciated!
Karen
I have made this bag and still have the pattern. Do you mind me asking what batting you used to make it so firm? Mine was way too floppy!
ReplyDeleteHi Quilter in the Gap - I used Stiff Stuff Firm sew-in interfacing from Sew Lazy to get Gracie to stand so nice and tall, and for the flap closure. I used Face-It Soft 100% cotton woven fusible lightweight interfacing for the handles.
ReplyDeleteMy best, Joan
Love it! I'm going to have to make one of these. I appreciate the time you've taken to engineer it so it's comfortable and useable.
ReplyDeleteLove the one handed bag sling-ability of Gracie - and the openness at her top. I am a tote bag kind of gal - and Gracie gives me the sophistication of a purse with the versatility of a tote bag - LOVE her!
ReplyDeleteI love that bag as well as many others she's created. I have yet to buy the Gracie pattern however but soon I hope.
ReplyDeleteYour demo is so easy to follow - think everyone needs a gracie in their lives x
ReplyDeleteI have the pattern and some fabric in a basket. Gotta get it out and make it. Thanks for the tutorialk.
ReplyDeleteThis looks great. Thanks for sharing!
ReplyDeleteYes I have always liked this bag and hope the pattern is still available. I have been unable to find the Gracie pattern.
ReplyDeleteI have fabric waiting to become a Gracie purse. Thanks for sharing you love of Gracie.